Guides
Setup Project
Learn how to setup your mobile project for compatibility with the Sahha SDK
Choose your platform:
iOS
Follow these steps to setup your iOS project:
Step 1) Enable HealthKit
Before you can connect to Apple Health, you must enable the HealthKit capabilities for your app.
You add capabilities to your app using the Signing & Capabilities pane of the project editor.
Add `HealthKit` entitlement to your Xcode project
- Select your App Target in the Project panel
- Select
Signing & Capabilities - Tap the
+button - Select
HealthKitfrom the list - Double-click the capability to add it to your project
Step 1.1
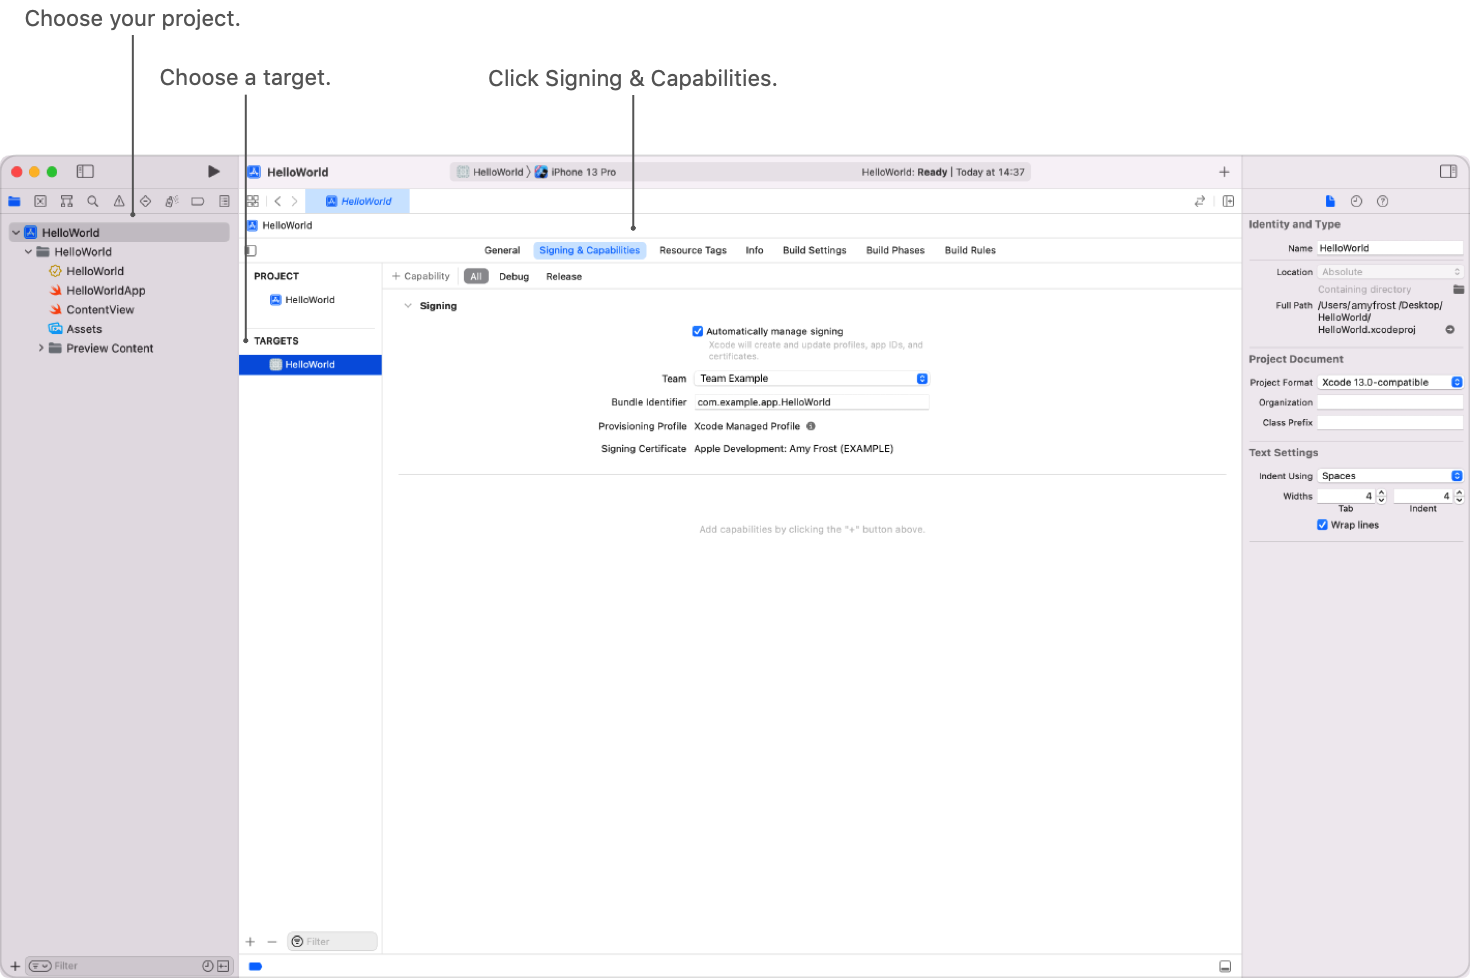
In the Project navigator of the main window, select the project — the root group with the same name as your app — and in the project editor that appears, select the appropriate target and then click the Signing & Capabilities tab.
Step 1.2
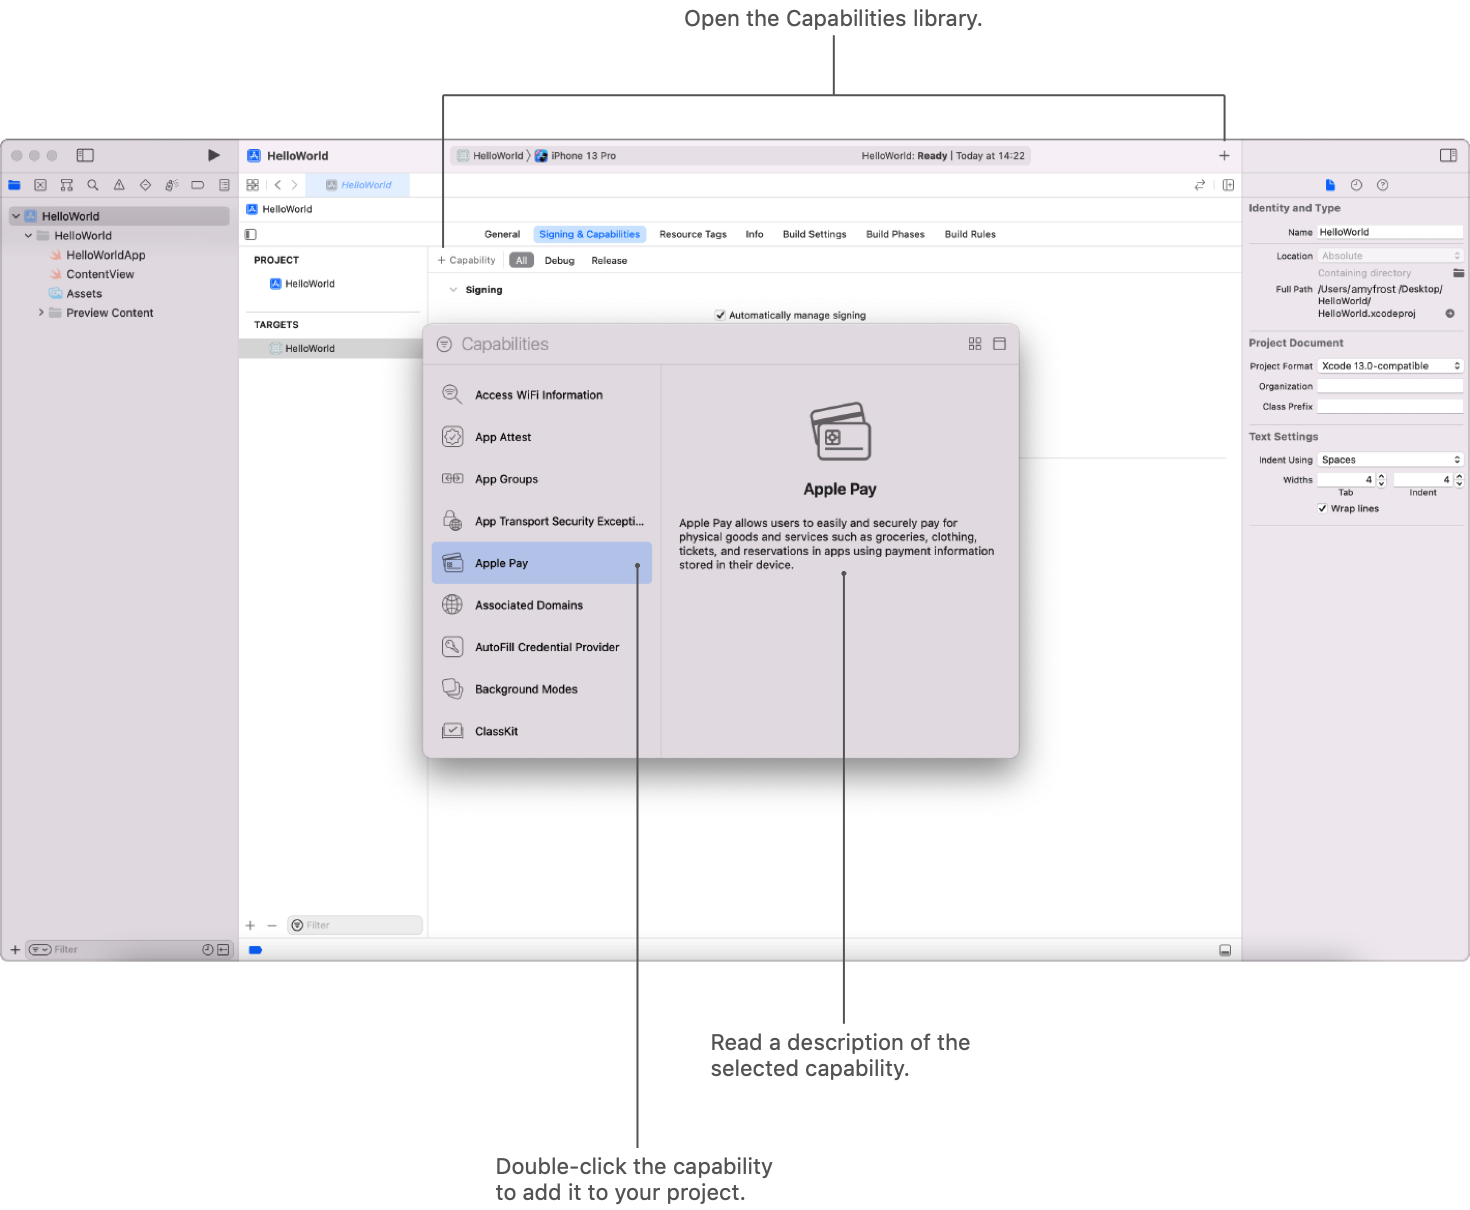
In the toolbar, click the Library button (+) to open the Capabilities library. Alternatively, click + Capability to the left of the build configurations, or choose Editor > Add Capability. The Capabilities library displays only the capabilities available to the target platform and your program membership. Select a capability in the list to view its description on the right.
Step 1.3
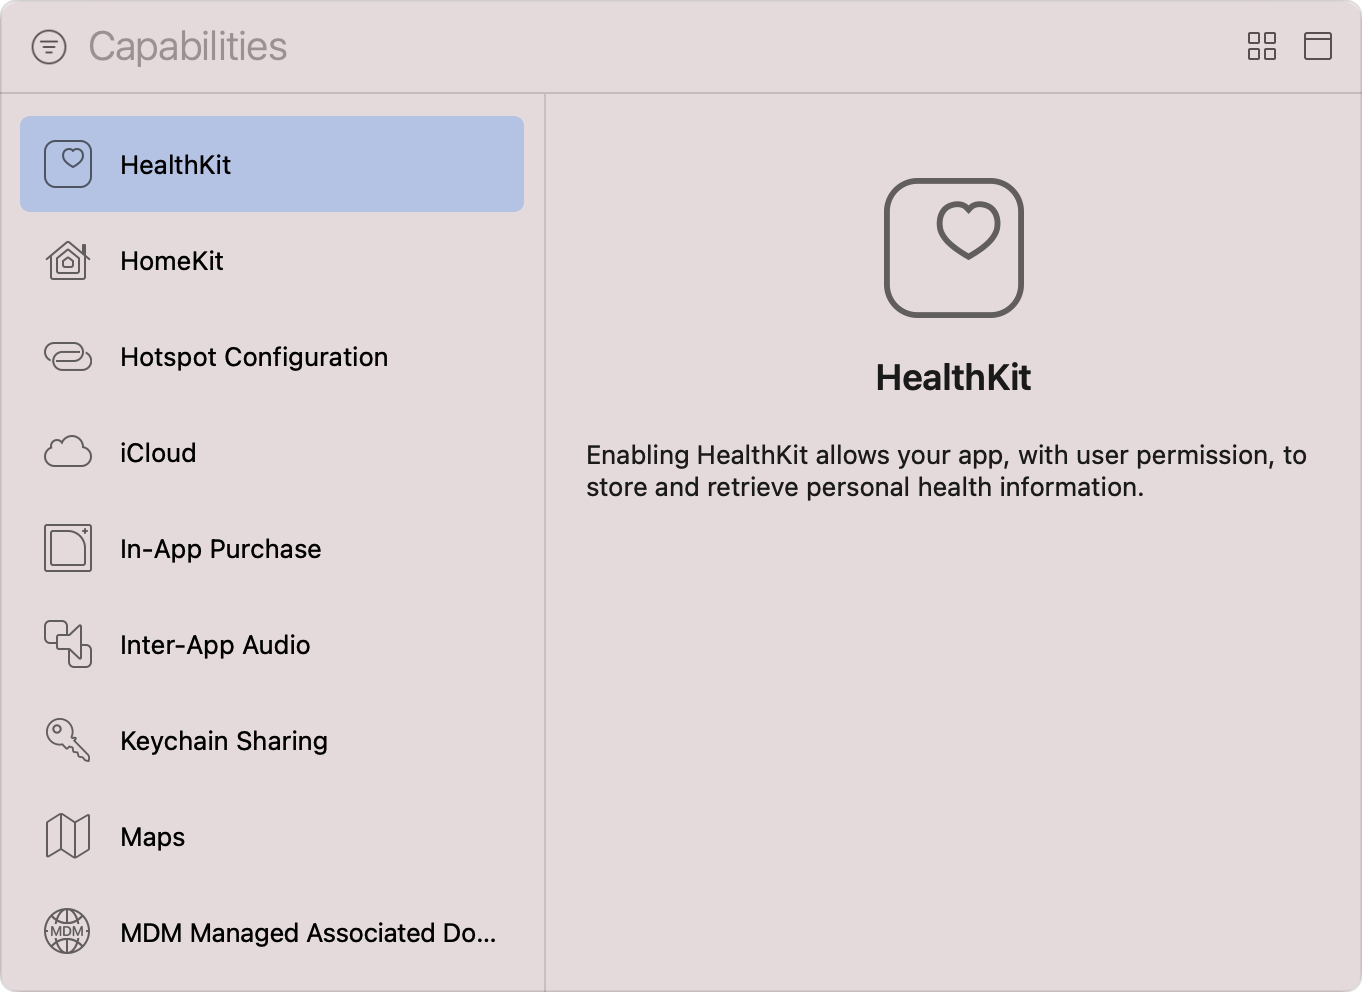
Select HealthKit from the list of capabilities.
Step 1.4
After you add the HealthKit capability, Xcode links the HealthKit framework to your target and updates the target’s entitlements file to include the HealthKit Entitlement. If Xcode automatically manages the signing of your app, it also enables HealthKit for your app’s App ID.
Step 2) Background Delivery
In order for the Sahha SDK to passively collect health data, your app will need to enable background delivery for HealthKit.
Add `Background Delivery` capability to your Xcode project
To enable HealthKit run even while your app is in the background, perform the following:
-
Select your project in Xcode’s Project navigator.
-
Select the app’s target from the Targets list.
-
Click the Signing & Capabilities tab in the project editor.
-
Find the HealthKit capability.
-
Enable the nested Background Delivery capability.
Xcode adds the com.apple.developer.healthkit.background-delivery entitlement to the target’s entitlements file.

Step 3) Add Usage Descriptions
HealthKit uses a fine-grained authorization mechanism to help protect the user’s privacy; your app must request permission to read and, optionally, write each individual sample type it supports.
Before prompting the user for their permission, you must configure your app to include one or more purpose strings, which accurately and concisely describe why the app needs to read the user’s health data, write health data to their HealthKit store, or both. The presence of these purpose strings is an App Store requirement for any app that integrates with HealthKit. The system displays this information to the user when requesting their permission, along with the specific sample types that your app needs to access, which helps them make an informed decision.
You will need to write a message explaining to the user why they should approve these permissions.
Add usage descriptions to your Xcode project
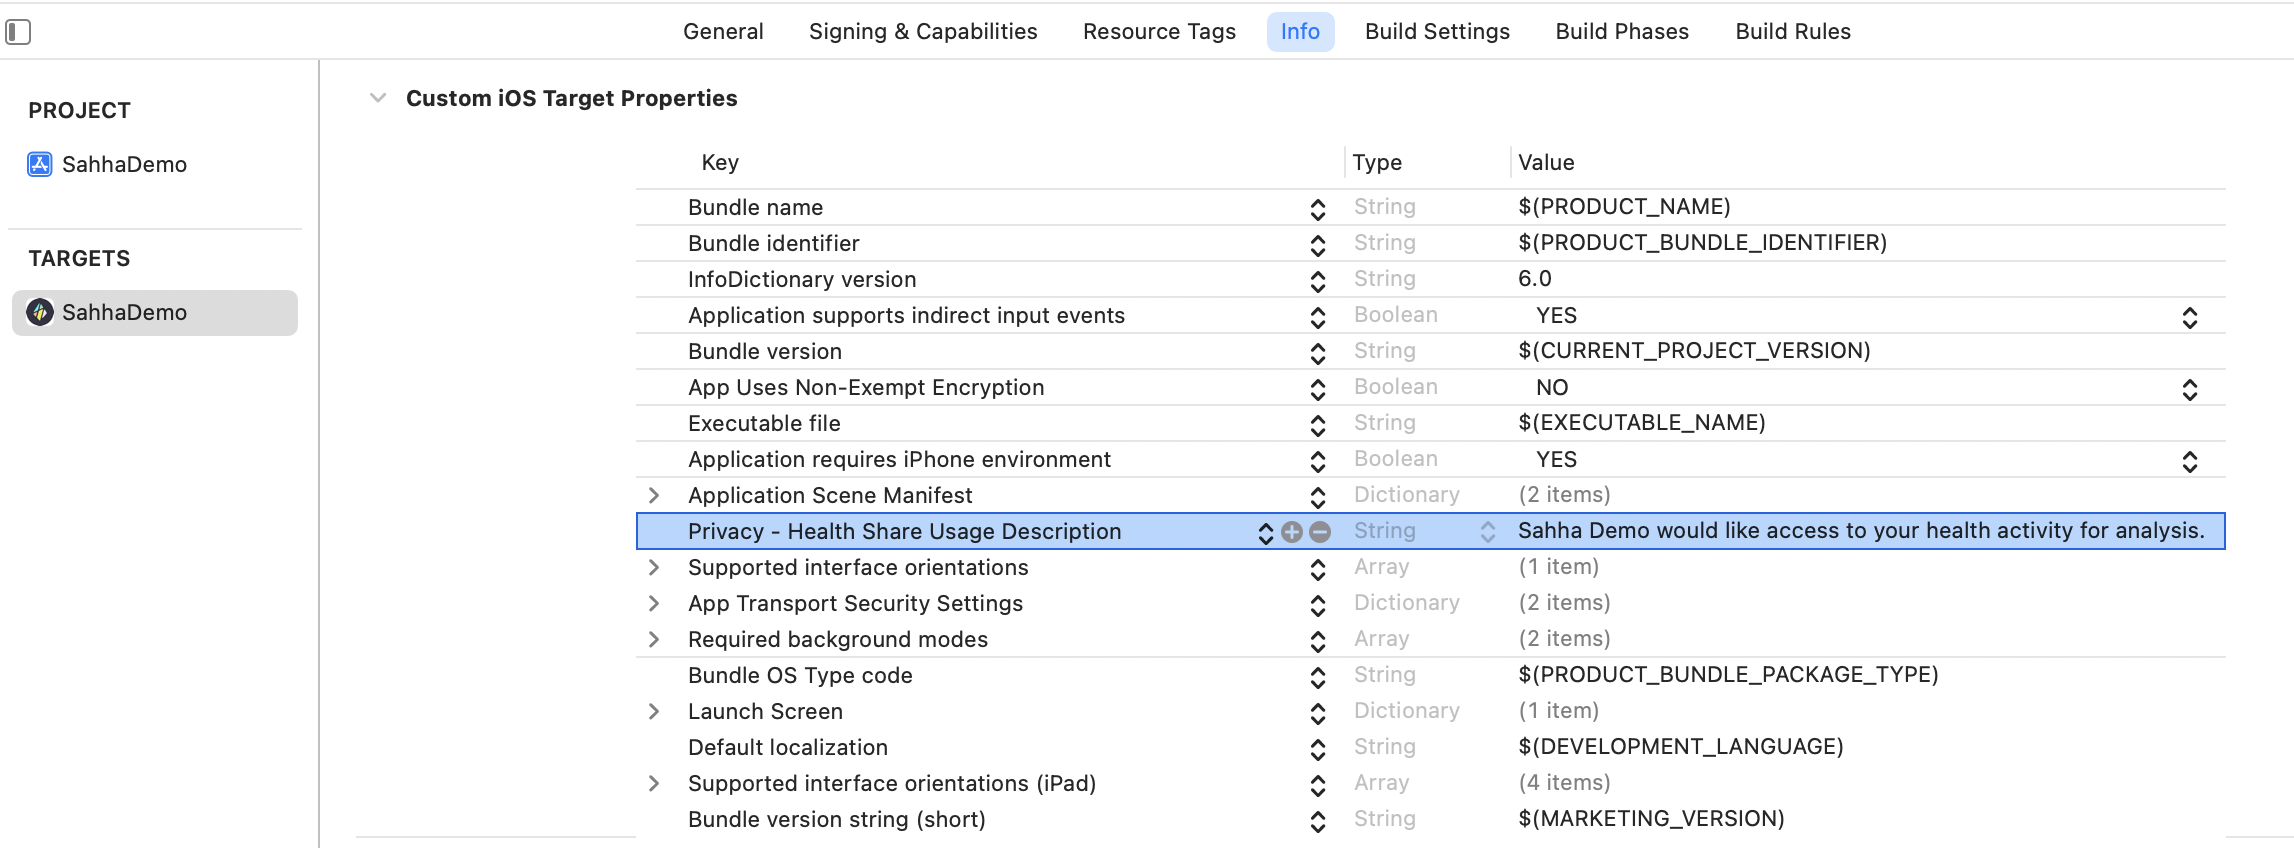
Follow these steps to add the usage description for reading health data to your app’s target:
- Select your App Target in the Project panel
- Select
Info - Tap the
+button to add a new key - Choose
Privacy - Health Share Usage Description. - Write a clear description for the key value such as
This app needs your health info to deliver mood predictions.
Android
Follow these steps to setup your Android project:
Step 1) Edit your AndroidManifest
In order to access your user's device sensors, you will need to include the correct uses-permission values in your project's AndroidManifest.xml.
Choose your framework to follow the correct steps:
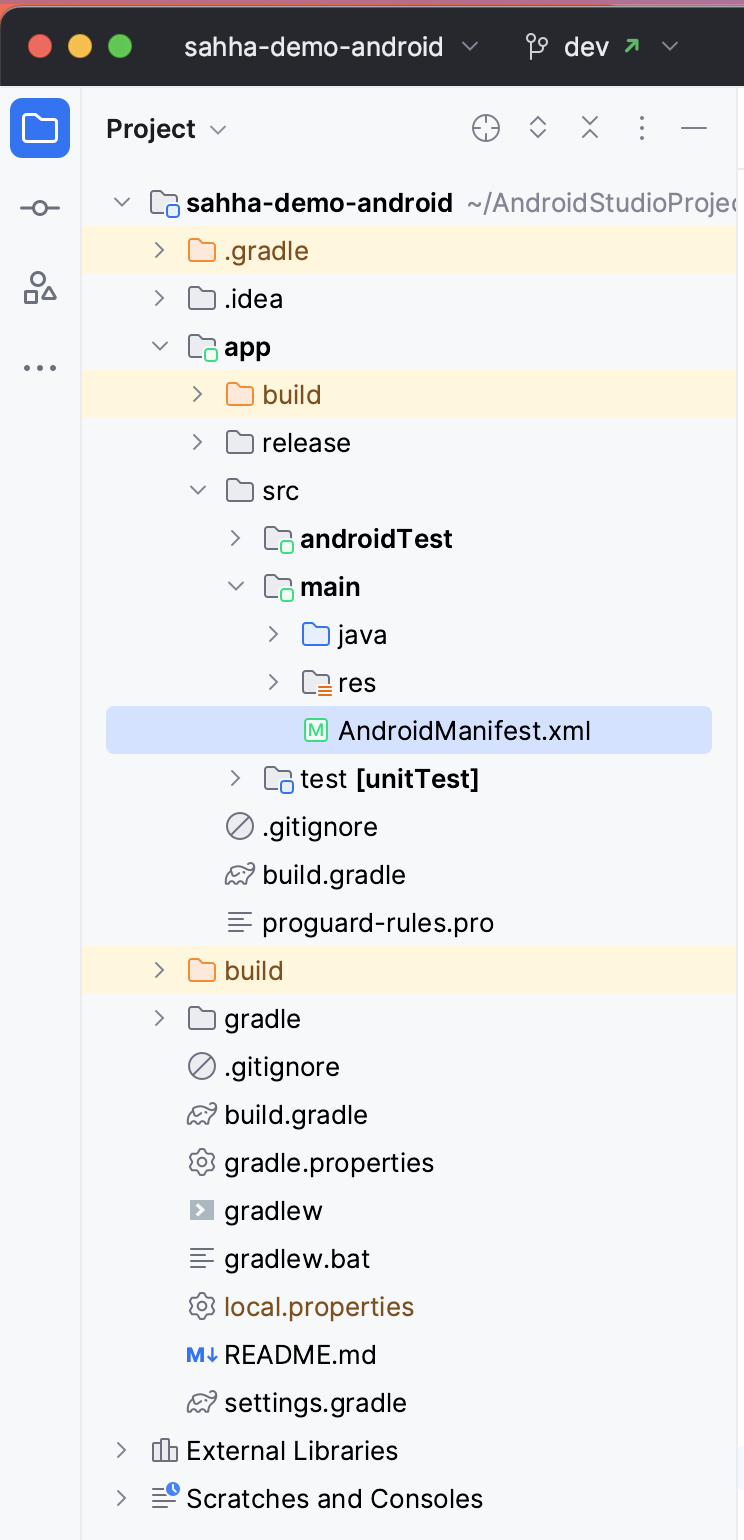
Step 1) Find the project’s AndroidManifest.xml file. This is located in the project’s app/src/main folder.
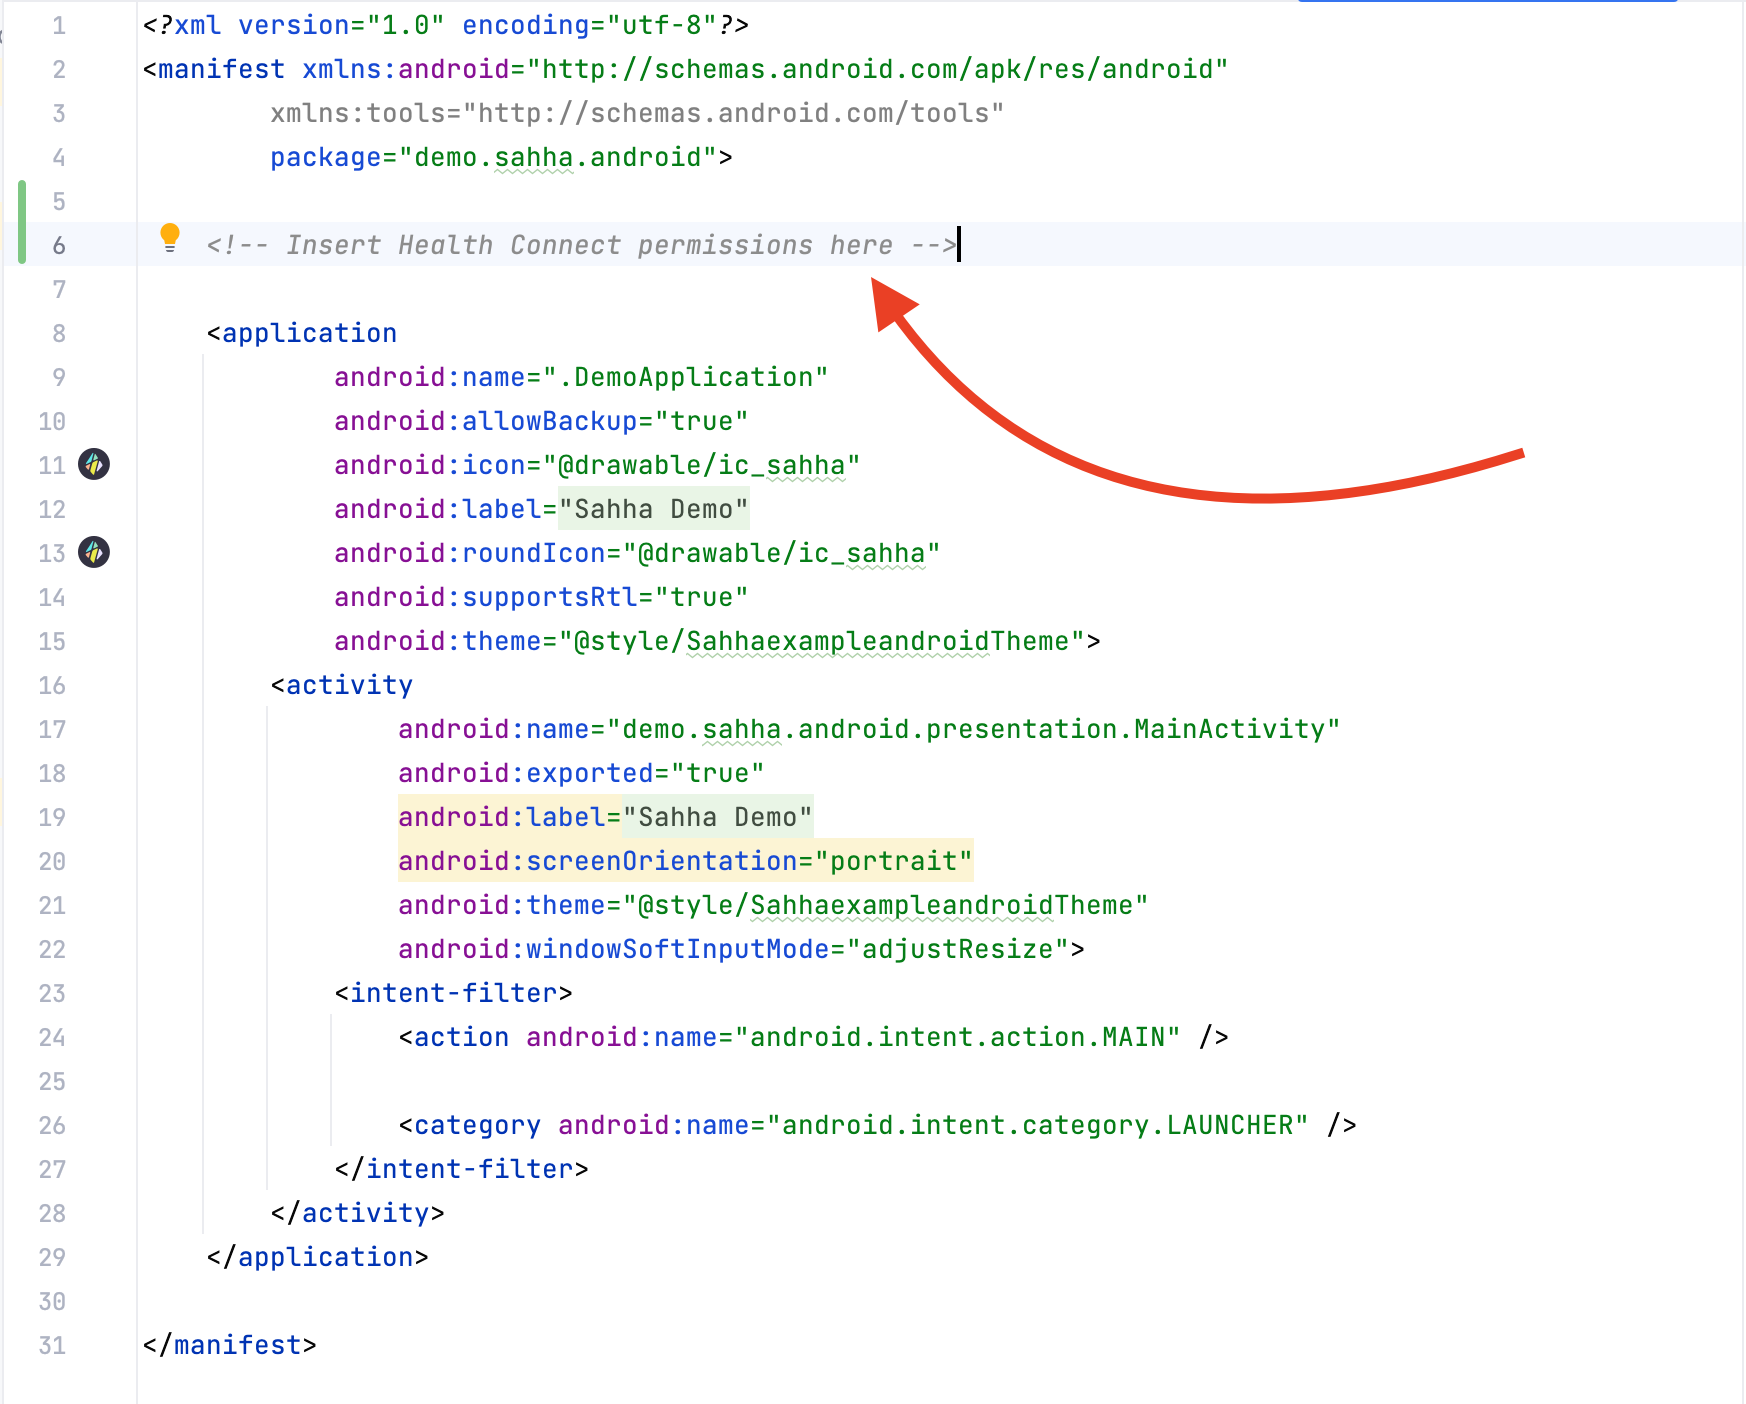
Step 2) Within the file, declare the permissions between the manifest and application code.
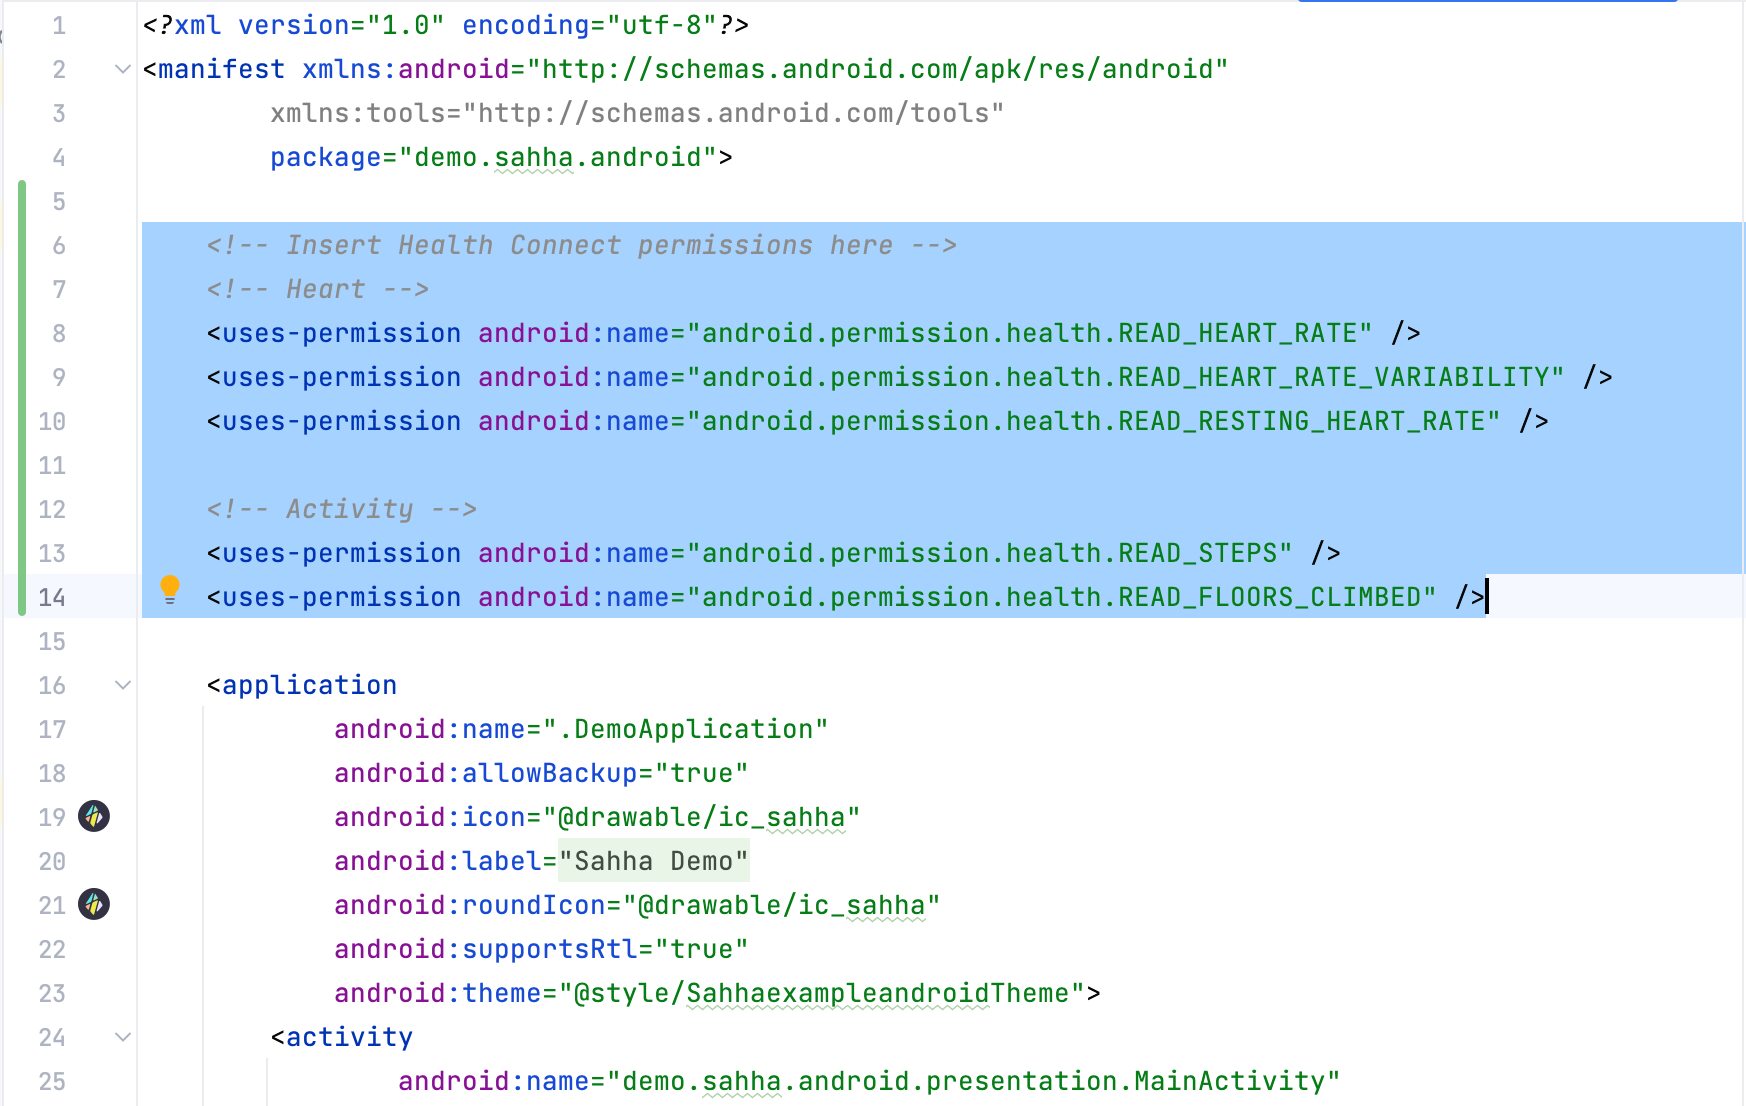
Step 3) Here is an example declaring Heart and Activity permissions. Make sure to save the file!
Step 2) Review Sensor Permissions
Each sensor has an associated user-permission values. Only include the sensor values required by your project. You can see the full list below.
<!-- AndroidManifest.xml -->
    <!-- heart_rate -->    <uses-permission android:name="android.permission.health.READ_HEART_RATE" />
    <!-- heart_rate_variability_rmssd -->    <uses-permission android:name="android.permission.health.READ_HEART_RATE_VARIABILITY" />         <!-- resting_heart_rate -->    <uses-permission android:name="android.permission.health.READ_RESTING_HEART_RATE" />
    <!-- blood_glucose -->    <uses-permission android:name="android.permission.health.READ_BLOOD_GLUCOSE" />
    <!-- blood_pressure_systolic -->    <!-- blood_pressure_diastolic -->    <uses-permission android:name="android.permission.health.READ_BLOOD_PRESSURE" />
    <!-- sleep -->    <uses-permission android:name="android.permission.health.READ_SLEEP" />
    <!-- step_count -->    <uses-permission android:name="android.permission.health.READ_STEPS" />
    <!-- floor_count -->    <uses-permission android:name="android.permission.health.READ_FLOORS_CLIMBED" />
    <!-- vo2_max -->    <uses-permission android:name="android.permission.health.READ_VO2_MAX" />
    <!-- oxygen_saturation -->    <uses-permission android:name="android.permission.health.READ_OXYGEN_SATURATION" />
    <!-- respiratory_rate -->    <uses-permission android:name="android.permission.health.READ_RESPIRATORY_RATE" />
    <!-- basal_metabolic_rate -->    <uses-permission android:name="android.permission.health.READ_BASAL_METABOLIC_RATE" />
    <!-- active_energy_burned -->    <uses-permission android:name="android.permission.health.READ_ACTIVE_CALORIES_BURNED" />
    <!-- total_energy_burned -->    <uses-permission android:name="android.permission.health.READ_TOTAL_CALORIES_BURNED" />
    <!-- body_fat -->    <uses-permission android:name="android.permission.health.READ_BODY_FAT" />
    <!-- body_water_mass -->    <uses-permission android:name="android.permission.health.READ_BODY_WATER_MASS" />
    <!-- lean_body_mass -->    <uses-permission android:name="android.permission.health.READ_LEAN_BODY_MASS" />
    <!-- bone_mass -->    <uses-permission android:name="android.permission.health.READ_BONE_MASS" />
    <!-- height -->    <uses-permission android:name="android.permission.health.READ_HEIGHT" />
    <!-- weight -->    <uses-permission android:name="android.permission.health.READ_WEIGHT" />
    <!-- body_temperature -->    <uses-permission android:name="android.permission.health.READ_BODY_TEMPERATURE" />
    <!-- basal_body_temperature -->    <uses-permission android:name="android.permission.health.READ_BASAL_BODY_TEMPERATURE" />
    <!-- exercise -->    <uses-permission android:name="android.permission.health.READ_EXERCISE" />
Device Sensor
Please note SahhaSensor.device_lock does not require any AndroidManifest.xml permission declarations.
Step 3) Specify your Sensors
Specifying Sensors for Android
For every sensor you specify in getSensorStatus or enableSensors, you will need to include matching uses-permission values in your AndroidManifest.xml.
View the SDK Sensors documentation .
If the values do not match, you are likely to receive build errors and risk your app being rejected on the Google Play Store!
For example, if your project requires the step_count and sleep sensors, then included the following uses-permission values:
<!-- AndroidManifest.xml -->
<manifest ... >
	<!-- step_count -->    <uses-permission android:name="android.permission.health.READ_STEPS" />
    <!-- sleep -->    <uses-permission android:name="android.permission.health.READ_SLEEP" />
	<application ... >		...	<application ... /><manifest ... />